RaspberryPi for monitoring screens
November 29, 2015
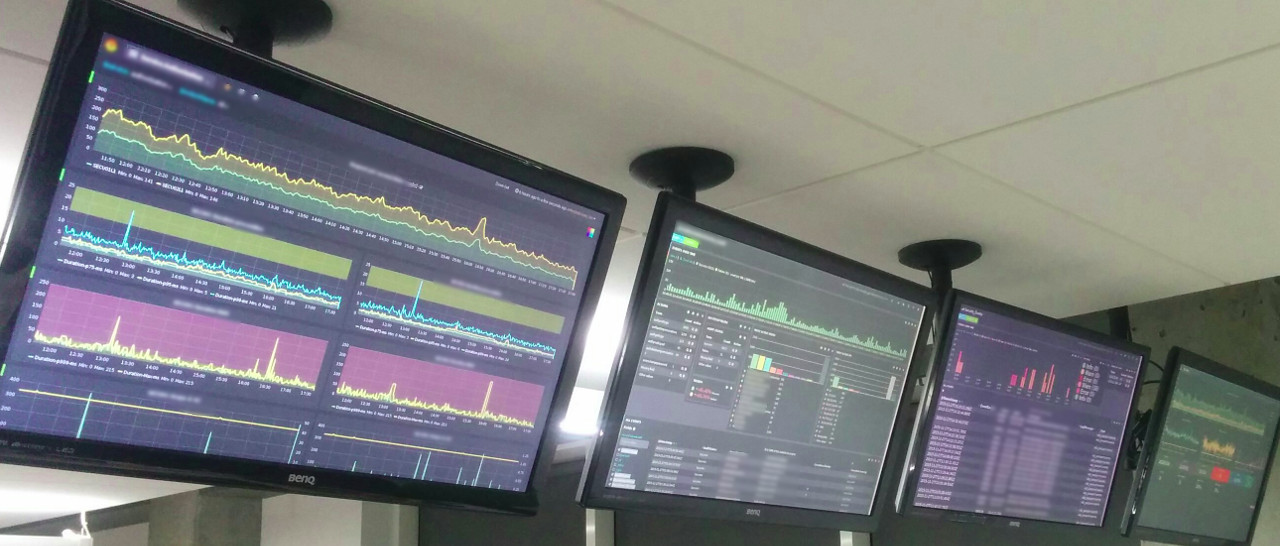
Displaying dashboard screens on a TV is a very common case, especially in IT companies. TVs in the offices display business dashboards or the status of the applications or infrastructure. Although there are multiple options to do it, we are mostly using RaspberryPi 2 to display Kibana, Grafana, Zabbix or other screens.
RaspberryPi 1 is too weak to display Kibana screens properly, therefore we had tried other alternatives as well. Google Chromecast devices, which are easy to use and cheaper than Raspberries, were dropping connections periodically, so they were unsuitable for the day-to-day use. Other options, like MiniPC’s are really good, but they are much more expensive.
RaspberryPi 2 is much more powerful than its predecessor and can handle “heavier” dashboards. They are pretty reliable, yet quite cheap, therefore we stuck to these devices.
However it needs to be configured properly in order to satisfy the following needs:
- The screen should be fully filled with the view
- After booting, the predefined screen should be loaded automatically
- The screen should not sleep after some period of time
- The mouse cursor should not be visible in the screen
- Menus and the taskbar should not be visible
- After an unclean reboot (i.e. after power outage), there should be no browser warning about the unclean shutdown
- It should be possible to connect to the device remotely to reload or change the view
What you need
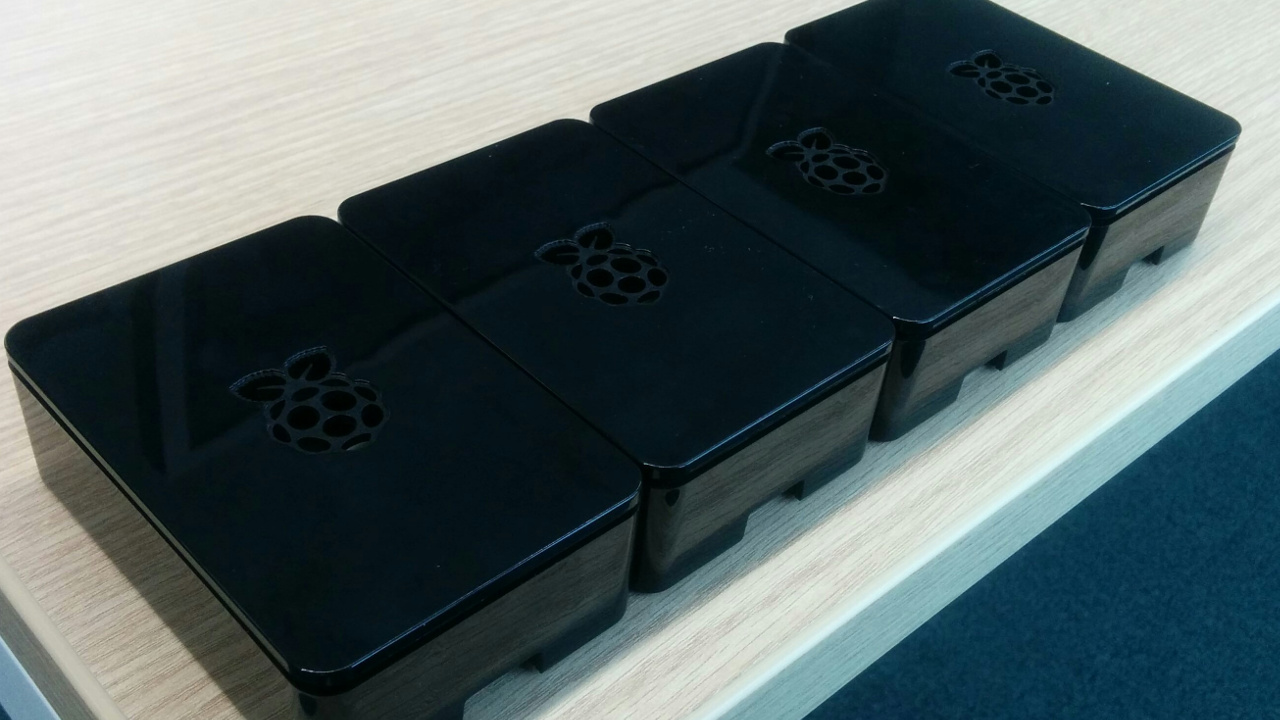
- RaspberryPi 2
- 8GB microSD card (preferably with microSD -> SD adapter)
- (preferably) RaspberryPi case
- DC charger with 5V output of 2 Amperes and with microUSB jack (very common nowadays, as it is used for charging smartphones and tablets).
- USB keyboard for configuration. A mouse is not necessary
Be aware that NOT all the SD cards are compatible with RaspberryPi. Refer to the compatibility list for the list of compatible/incompatible SD cards.
Download OS for the RaspberryPi
The RaspberryPi comes with no operating system and with no internal storage. Therefore it is necessary to download the Operating system and install it to the microSD card. The officially supported OS is Debian-based Raspbian, although there are 3rd party OS images available as well.
Although there is an “easy” installation method “Noobs”, I prefer downloading regular Raspbian image and copy it to the SD card.
For this tutorial I was using Raspbian Wheezy. There might be some nuances with the newer versions of Raspbian. Please share your feedback if you are using Jessie or newer versions of Raspbian.
Copy image to the SD card
Burning an SD card from image using Windows can be done with the Win32 disk imager application.
From Linux the dd utility is used. Firstly it is necessary to unmount all partitions from the SD card (if they are mounted). The next step is copying the image to the SD card using the following command:
$ sudo dd if=/path/to/raspbian/image of=/dev/mmcblk0 bs=4M
The dd command parameters are these:
if- the input file (downloaded image)of- the output file (destination). Important: the path might depend on your hardware. It must be a path to the device, but not to the partition. I.e. NOT/dev/mmcblk0p1(partition), but/dev/mmcblk0(device).bs- the block size. If not provided, the default 512 bytes block size is used for copying. Bigger block sizes ensure better performance up to some level. Providing at least 4 kilobytes (bs=4k) will give the optimal performance.
See also: Raspbian installation guide
Plugging-in
After the SD card is prepared, it is needed just to plug it in, connect power and Ethernet cables and plug the HDMI cable to RaspberryPi and the TV set. The RaspberryPi will boot to the command line.
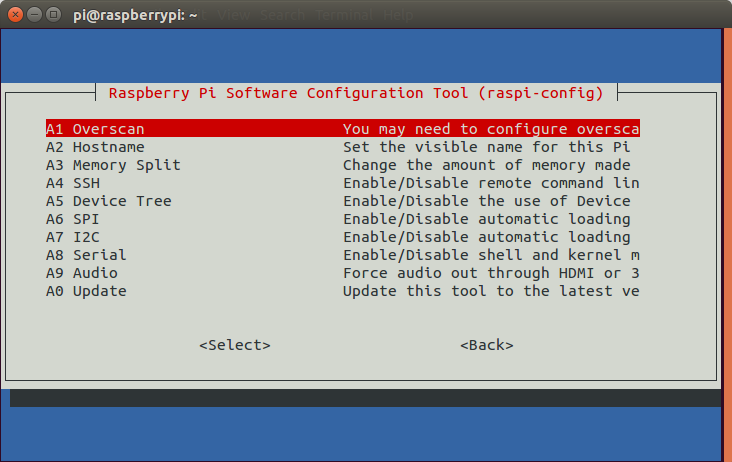
Configure Raspberry
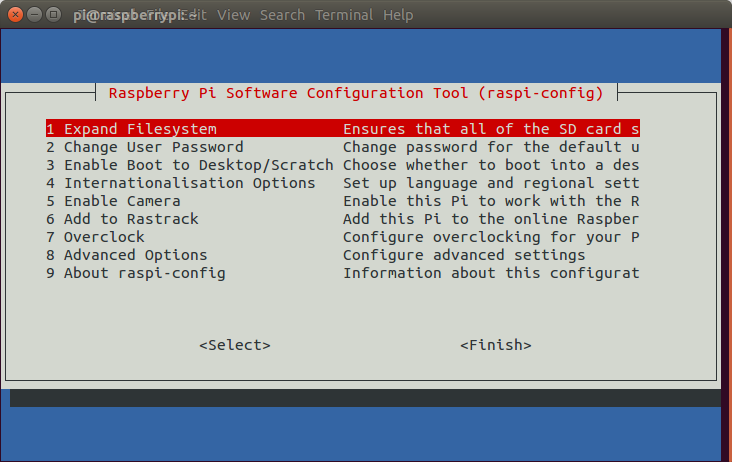
Firstly, perform the basic configuration actions by launching the raspi-config utility as a root user:
$ sudo raspi-config
Expanding filesystem to the SD card size
In order to use the full capacity of the SD card, it is necessary to expand the filesystem:
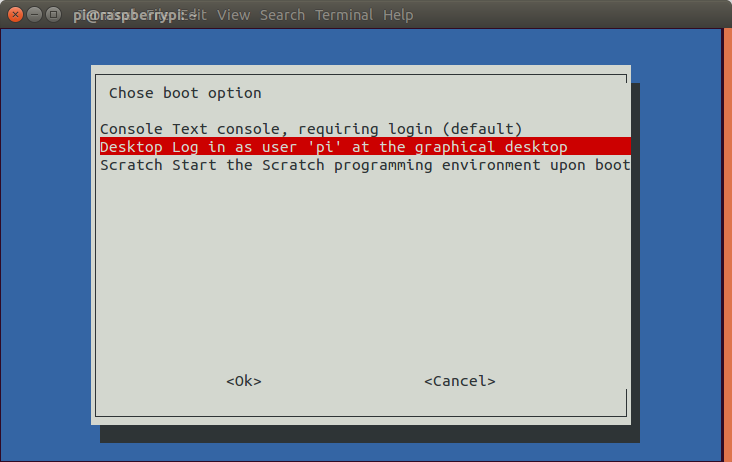
Booting to the GUI instead of command line

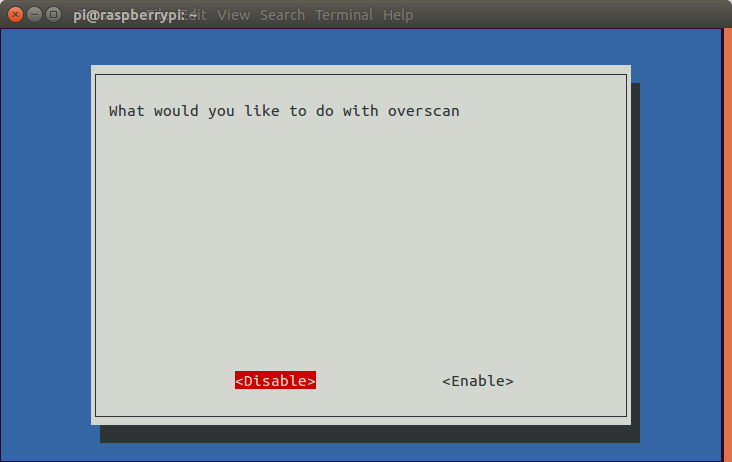
Disabling overscan
In order to fill the TV screen fully with the view, it might be necessary to disable Overscan:

Connecting via SSH
All this and further configuration can be done by connecting to the RaspberryPi from the remote computer via SSH:
$ ssh pi@<raspberry IP address>
The default user is pi, the password is raspberry.
The one thing that needs to be known is the IP address to connect to. This information can be obtained using ifconfig command (run from RaspberyPi command line).
Changing password
Due to security reasons it is wise not to use the default password for RaspberryPI, as it is a normal computer inside your network.
The password can be changed with passwd command.
Also I recommend to use SSH keys when connecting to RaspberryPI via SSH.
Changing time zone
By default RaspberryPI should operate in UTC time. It can be useful to set the timezone according to specific location. It can be done using command dpkg-reconfigure tzdata.
Updating system
Run the following commands to update the system:
sudo apt-get update
sudo apt-get upgrade
Installing applications
The following applications will be used:
chromiumoriceweaselweb browserunclutterto hide the mouse cursorxscreensaverto disable a screen from sleepingxautomation- to send commands to X system viaxtecommand (to make iceweasel run in fullscreen mode).
It is possible to install them from a repository using the following commands:
$ sudo apt-get install chromium-browser iceweasel unclutter xscreensaver xautomation
Configuring unclutter
It is necessary to setup unclutter to run automatically by writing the following text to the file ~/.config/autostart/unclutter.desktop
[Desktop Entry]
Version=1.0
Type=Application
Name=unclutter
Exec=unclutter -idle 1 -root
Terminal=false
StartupNotify=false
Configuring xscreensaver
To disable the screensaver (the screen becoming blank when after the inactivity period) it is necessary to create a file ~/.xscreensaver with the content:
mode: off
Configuring chromium
2016-03-23 note: the latest version of Chromium in the repository is 22. For some web applications (i.e. Kibana 4) this version is too old. Consider using other up-to-date web browser (i.e. Firefox) or build Chromium from source or use alternate repository.
Running chromium
Chromium is run by executing the ~/run_chromium.sh script. The only thing that needs to be changed is the URL that has to be opened.
Create ~/run_chromium.sh with content:
#!/bin/bash
rm -rf ~/.chromium_temp_dir
DISPLAY=:0 chromium-browser --kiosk --incognito --disable-translate --user-data-dir=.chromium_temp_dir http://example.com
It uses the custom user directory in order to prevent unclean shutdown errors. The --incognito flag should be enough, but if the user profile directory gets corrupted, this is the easiest way to bypass any errors.
--kiosk will run browser in the “Kiosk” (full-screen with some other restrictions) mode.
--disable-translate will not suggest to translate the websites.
Restarting chromium
In case it is necessary to restart Chromium (i.e. if it gets stuck or the dashboard URL needs to be changed), the ~/restart_chromium.sh script can be run. It works well when being connected via SSH, so there is no need to plug the keyboard or mouse to the RaspberryPi to restart it.
Create ~/restart_chromium.sh with content:
#/bin/sh

killall chromium-browser
~/run_chromium.sh > /dev/null 2>&1 &
Making chromium auto-run
Shell scripts should be runnable. This can be done by running command chmod 0755 ~/run_chromium.sh ~/restart_chromium.sh.
Create ~/.config/autostart/chromium.desktop with the content:
[Desktop Entry]
Version=1.0
Type=Application
Name=chromium-browser
Exec=~/run_chromium.sh
Terminal=false
StartupNotify=false
Note: if Chromium does not start from Desktop file, add text
@/home/pi/run_chromium.shto~/.config/lxsession/LXDE-pi/autostartfile.
Iceweasel - an alternative to Chromium
As stated previously, Chromium build is very old in the repository. To use Kibana4 and other modern web applications, the recent web browser is needed.
The good alternative can be the Firefox fork Iceweasel.
The configuration is identical to the one described in the previous section, despite the content of run_chromium.sh should be the following
#!/bin/bash

iceweasel "http://www.example.com" --display=:0 &
sleep 15s;
xte "key F11" -x:0
Cloning SD card
After the single SD card is configured, it might be useful to clone it to run multiple instances of Chromium on multiple TVs. It can be done using the same dd command.
Create an image from the SD card:
$ sudo dd if=/dev/mmcblk0 of=~/sdcard.img bs=4M
Clone the image to the card:
$ sudo dd if=~/sdcard.img of=/dev/mmcblk0 bs=4M
Credits and further reading
Big thanks to Julius Vitkauskas for aggregating the best ideas.
You can also read blog posts from alexba.in or danpurdy.co.uk.